On my trip to Winnemucca and Dearborn, I brought my blazing orange Nanuk Amtrak Cooler. It was my first attempt at bringing my own refrigerated food. A couple of great meals came out of that cooler but it did have serious drawbacks. It wasn’t a failure, though, because it taught me some important things. The main things I learned were that the cooler needs to be lighter, and it needs more insulation. I also learned that every time I open it, the temperature inside rises due to the introduced warmer air. Armed with this information, I am making Amtrak Cooler 2.0.
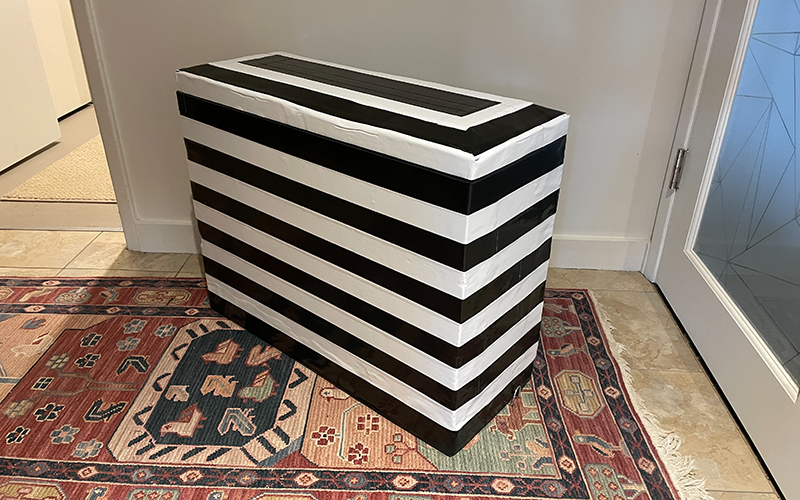
The heaviest part of my first cooler was the Nanuk case. I bought it because it came the closest to meeting Amtrak’s luggage dimension requirements of 28 inches wide, 22 inches tall and 11 inches deep. (A 14-inch depth is allowed on most trains, but the Coast Starlight train has an 11-inch depth restriction) No retail cooler comes anywhere close to these dimensions, hence the need to go the bespoke route. What’s the best way to eliminate the weight of the case? Eliminate the case completely! Based upon the inadequate Nanuk cooler’s 2 inches of insulation, I learned that I need at least 3 inches.. Fortunately, 3 inches of rigid board insulation will give my cooler all the structural integrity it needs. The exterior will be a bit ugly, though, so I need a lightweight solution for dressing it up. I settle on black and white duct tape, applied in a striped fashion reminiscent of a cathedral I fell in love with in Siena, Italy. The beautiful simplicity of this approach is that if the exterior is damaged, it is very easy to fix.
To address the warm air invading the cooler when it is opened, I decide to tackle this in several ways. 1) There will be 2 compartments: a freezer and a refrigerator. Each will have a secondary lid below the main lid. When I open the refrigerator compartment for lettuce, cheese or fruit, I only remove the refrigerator lid: the freezer will be unaffected. 2) When I open the freezer compartment, I will remove a full day’s portion. This means it is only opened once a day, limiting the amount of warm air infiltration. When I replace the secondary lid of the freezer compartment, I will push it down lower so that it is touching the next day’s portion of frozen food, removing most of the unwanted warm air from the freezer. 3) The freezer portions will be squished into a shape conforming to the inside of the freezer compartment. When put on top of each other, they will make a solid block, limiting the amount of warm air intrusion. Yummy, huh?
Each freezer food portion will have its own ice gel block. If the ice gel block in the refrigerator compartment loses its oomph, I will replace it with the ice gel block that was freezing the just-removed daily freezer portion of food. This, along with the Bluetooth temperature sensors, will help me control the temperature of the refrigerator…not too hot, not too cold; just right. The sensors will also let me know when it’s time to get my food and ice gel blocks to the nearest freezer for a chilling boost. Anyway, that’s the plan. I still need to build the thing and test it out.
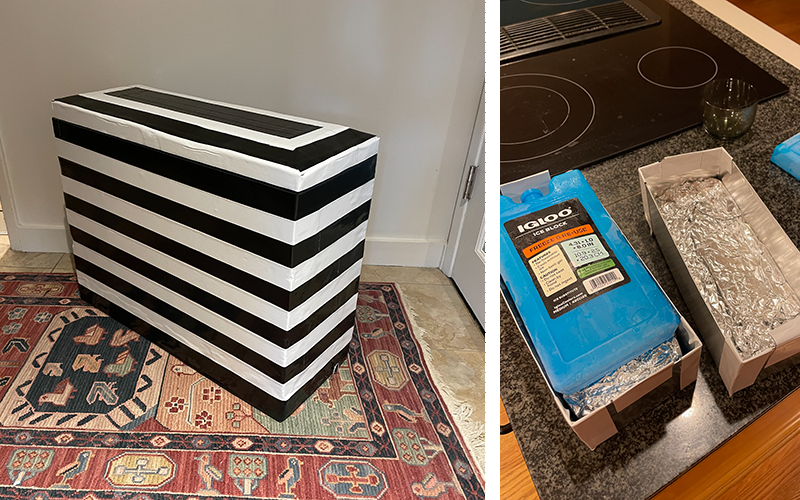
Fast-forward, it’s built. (If you want the gory build details, contact me) The cooler is more reminiscent of Tim Burton’s Beetlejuice than an Italian cathedral but I’m pleased with its appearance. The next step is to test my design theories and see if they work. I prepare meals for the freezer compartment. I cook brown rice and chicken, then divide them into 3 daily portions. I then press them into a mold lined with aluminum foil, and make my daily bricks of frozen food. Each brick is approximately 4 inches by 8 inches by 2 inches. These go into my home freezer overnight. For the Amtrak refrigerator compartment I have apples, oranges, cheese chunks, dates, romaine lettuce, butter, and miso paste divided into soup serving sizes. All of this goes into my home refrigerator overnight. In my luggage I will have nuts, tea bags, olive oil, vinegar, salt, pepper, cayenne powder, garlic powder, dried seaweed for my miso soup, a loaf of fresh homemade bread, and restaurant packs of mayonnaise and mustard. Tomorrow, all the food in the home refrigerator and freezer will be transferred to my Amtrak cooler. For the next three days I will “eat out of the fridge”. I’m not just testing the cooler; I’m testing the whole home-made meals-on-the-train concept.
The next morning I prepare to stock my cooler. The night before, I lined both compartments with space blankets for added insulation and put ice gel packs. These gel packs won’t be going on vacation. Their only function is to pre-chill the inside. I remove the overnight gel packs and transfer all the food goods into the Amtrak cooler along with fresh, frozen gel packs. The freezer portions get one on the bottom, one on the top, and one on either side of the middle one. The refrigerator compartment gets a gel pack on one side of the compartment, separated from the lettuce on the other side so that it doesn’t freeze it. A Bluetooth temperature sensor is placed in the refrigerator compartment, nestled in with the lettuce. Two temperature sensors were smooshed into the bottom two food blocks the night before. Let the experiment begin!
I draw a graph showing time vs temperature. At zero hours my freezer compartment temperature is 8 degrees Fahrenheit. At 8 hours the temperature has risen to 21 degrees. Not good. The temperature rise begins to slow down, but after a total of 24 hours the temperature increases to a sweltering 27 degrees. Even less not good. After that, though, my graph begins to flatline, with the temperature staying at or below freezing for the next 56 hours! Without realizing it, I inadvertently create a demonstration showing the Latent Heat effect. If you take a cube of glass out of the freezer and graph the time/temperature change as it absorbs the heat in the room, you will see a gradual rise in temperature until it hits the ambient room temperature. If you do the same thing with a cube of ice, you will see a gradual rise until it hits 32 degrees. The temperature will then loiter there for a while before continuing its gradual rise. The loitering happens because the process of water transitioning from a solid to a liquid requires the absorption of additional heat before the temperature can continue to rise. Gel packs are like ice cubes on Steroids, loitering at 32 degrees for a long enough time to make mailing Omaha Steaks to Seattle a thing. This also means, though, that if the temperature in my freezer compartment hits 33 degrees, the Latent Heat effect is over, and I’d better find a place to refreeze everything pronto.
There is a saying that goes “The proof is in the pudding”. In my situation, the proof is in the lettuce, fruit and chicken, and they prove to be delicious. I enjoy my meals over the next couple of days, and I’m confident I can travel by train from Seattle to New York City without the need to buy a single meal. Freedom! The cost of building this cooler was around $140, which is not cheap. Assuming, though, that I use it many times, it is a real bargain.